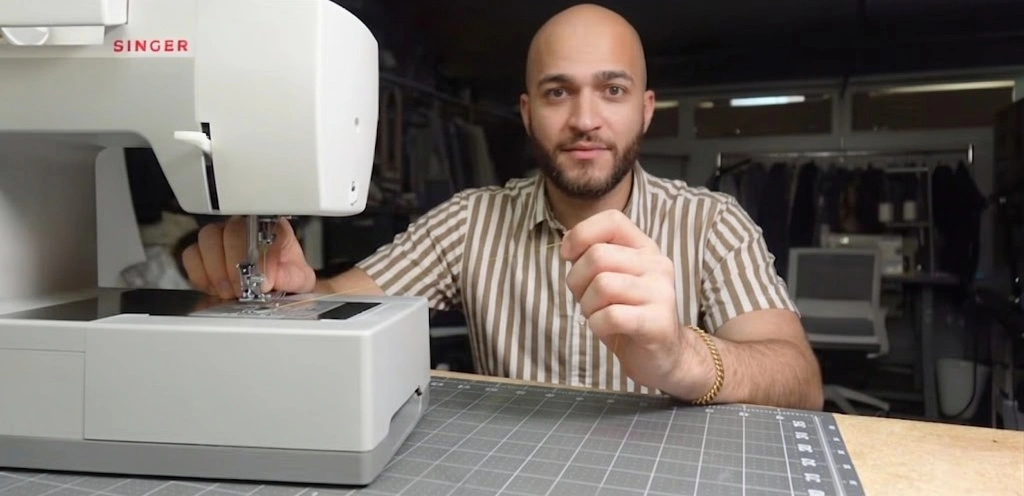
Threading a sewing machine is the first thing you do before every sewing session, and the one step most beginners get wrong. A single mistake, skipping a guide, threading the tension discs incorrectly, or loading the bobbin backwards, produces hours of frustrating results: thread that breaks mid-seam, loops bunching under the fabric, or a needle that won’t catch at all.
This guide covers the complete threading process in three parts: upper threading, bobbin winding and loading, and bringing up the bobbin thread. Follow each step in order, and you’ll go from an empty machine to ready-to-sew in under five minutes.
What you need before you start
- Your sewing machine (powered off)
- A spool of thread
- One or two empty bobbins (matching your machine — check your manual for the correct bobbin size)
- The correct needle for your fabric (a size 80/12 universal needle suits most beginners)
- Scissors
Before you thread: Always thread your machine with the power switched off and the presser foot raised. The presser foot lever opens the tension discs — if the foot is down when you thread, the thread won’t sit correctly in the discs and will snap the moment you start sewing.
Part 1 — Upper threading (10 steps)
The upper thread runs from your spool, through a series of guides and tension discs, down through the take-up lever, and finally through the needle. Most machines have numbered guides printed directly on the machine; follow them in order.
Raise the needle to its highest position
Turn the handwheel toward you (counterclockwise as you face the machine) until the needle is fully raised. The take-up lever, the hook-shaped arm that moves with the needle, should also be at its highest point. Threading with the needle at any other position causes the thread path to shift and the thread to snap.
Raise the presser foot
Lift the presser foot lever, usually located on the right side of the machine head. This opens the tension discs so the thread can seat correctly between them. This step is easy to forget and is the single most common cause of thread breaking and bunching.
Place the thread spool on the spool pin
Set the spool on the spool pin at the top of the machine. If your machine has a horizontal spool pin, secure the spool with the spool cap, this stops the thread unwinding unevenly. For a vertical spool pin, the thread should unwind from the back of the spool. Check your manual if you’re unsure which direction.
Guide thread to the first thread guide
Pull thread from the spool and guide it into the first thread guide at the top of the machine. On most machines this means pulling the thread to the left, then hooking it into a small notch or bar. This first guide controls the overall thread tension from the spool.
Pull thread down the right channel
Draw the thread down toward the front of the machine following any numbered guides or arrows. The thread should move in a U-shape: down on the right side, through the tension discs, then back up on the left side. Many machines have a groove or channel for this, keep the thread within it.
Thread through the tension discs
Guide the thread between the two tension disc plates, which are usually located at the base of the U-shaped channel. You should feel a slight resistance as the thread seats between the discs. If your machine has a dial tension adjustment, this is where it acts on the thread. No resistance here means the thread missed the discs entirely.
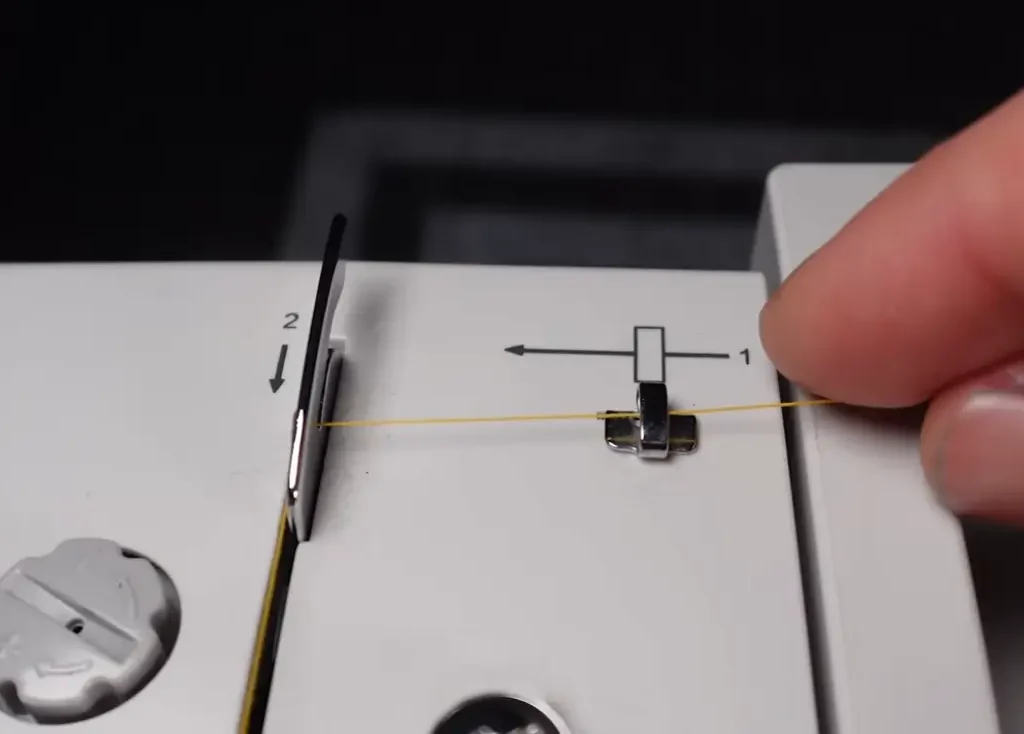
Thread through the take-up lever
Pull the thread UP and hook it through the take-up lever, the U-shaped or hook-shaped arm at the top of the needle area. Thread passes right-to-left through the hole or hook. The take-up lever controls how much thread is fed with each stitch; missing this step causes the thread to snap after just a few stitches.
Pull thread down through the remaining guides
From the take-up lever, guide the thread downward through any remaining thread guides toward the needle. Most machines have one or two small hooks or loops near the needle bar. Hook the thread through each one in order. These keep the thread straight and prevent it from wrapping around the needle bar.
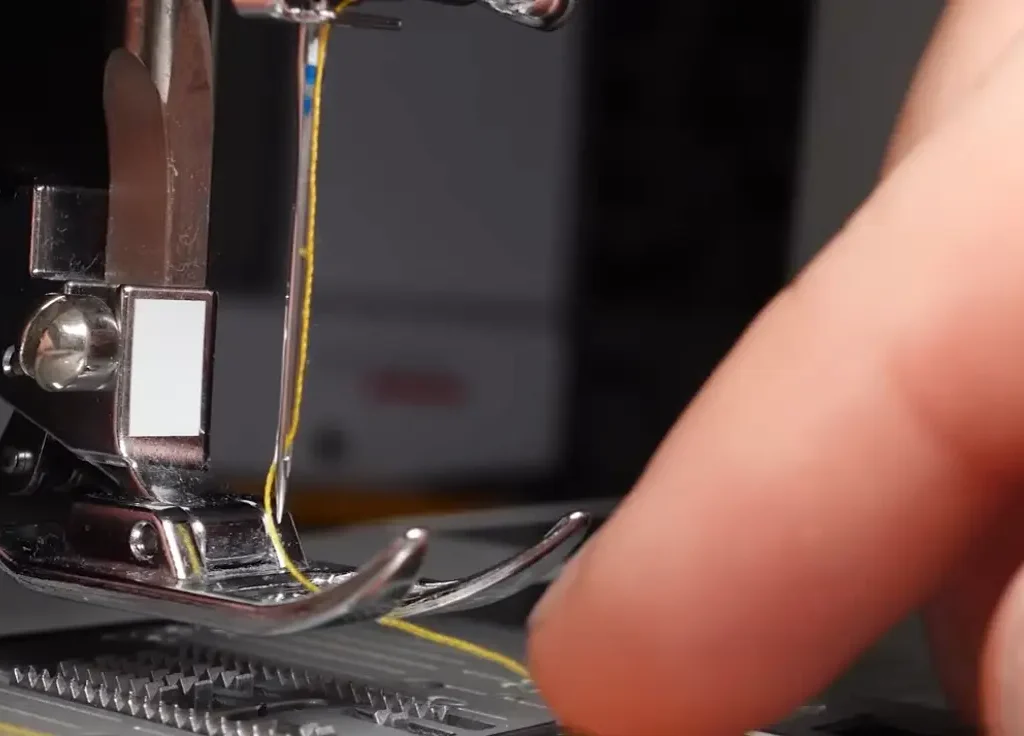
Thread the needle
On most machines, thread passes through the needle from front to back. If your machine has an automatic needle threader, lower the lever fully, hook the thread around the guide wire, and release the lever slowly. The wire will pull a loop through the needle eye. Pull the loop through to complete threading. If threading manually, use good light and cut the thread end cleanly at an angle before attempting to pass it through the eye.
Leave a thread tail of 6 inches
Once the needle is threaded, pull approximately 6 inches of thread through so it hangs freely. You’ll need this tail to pull under the presser foot along with the bobbin thread once the bobbin is loaded. A tail that’s too short will pull back through the needle when you start sewing.
Upper threading done. The thread should now run in a continuous path: spool → top guide → down the right channel → through tension discs → up through the take-up lever → down through the needle bar guides → through the needle eye. If it deviates from this at any point, re-thread from the spool.
Part 2 — Winding and loading the bobbin
There are two separate processes here: winding thread onto the bobbin, and loading the bobbin into the machine. If your bobbin is already wound with the right thread colour, skip to step 4.
Winding the bobbin (steps 1–3)
Place an empty bobbin on the bobbin winder spindle
The bobbin winder spindle is usually on the top right of the machine. Place an empty bobbin onto it. Guide thread from the spool through the bobbin winding thread guide (usually a small notch or guide near the spool pin), then through the small hole on the top of the bobbin, and tie or hold the thread end.
Engage the bobbin winder
Slide the bobbin spindle to the right (or press it down, depending on your machine) to engage the bobbin winding mechanism. On most machines, this also disengages the needle so it doesn’t move while winding — you can confirm this by turning the handwheel, which should now spin freely without moving the needle.
Wind the bobbin and trim
Press the foot pedal to wind thread onto the bobbin. Most machines stop automatically when the bobbin is full. Hold the thread end for the first few rotations, then let go. Once complete, slide the spindle back to the left, remove the bobbin, and trim the thread close to the bobbin face. Don’t overfill — a bulging bobbin causes tension problems.
Loading the bobbin — drop-in style (steps 4–6)
Most modern machines use a drop-in (top-loading) bobbin. If your machine uses a front-loading bobbin, see the brand-specific notes in Part 4.
Open the bobbin compartment and place the bobbin
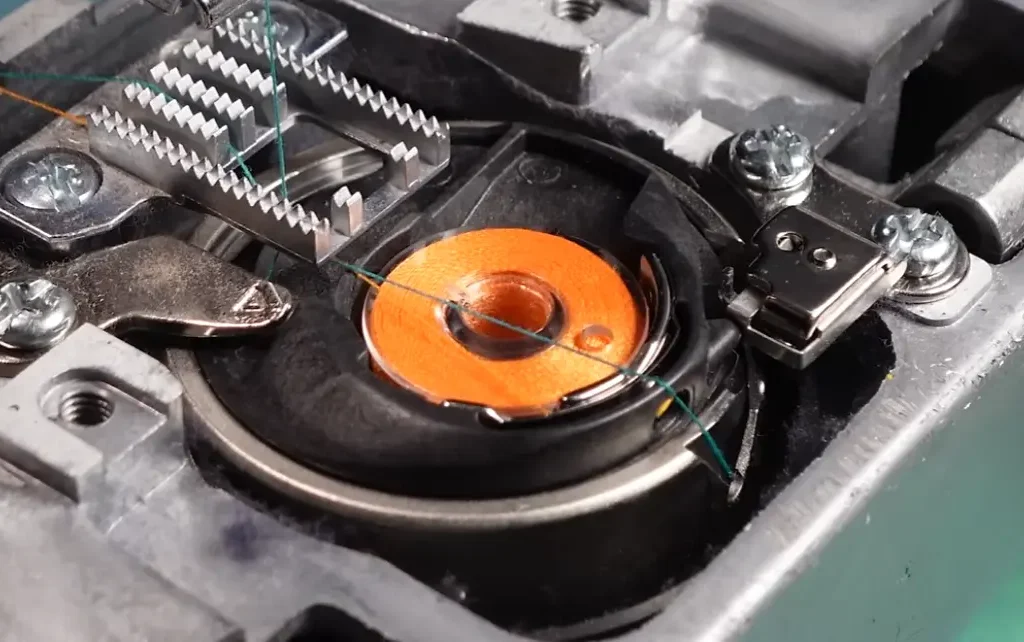
Slide open the clear cover on the bobbin compartment (usually to the right, at the base of the needle area). Drop the wound bobbin into the compartment. The thread should unwind counterclockwise — most machines have a small diagram on the bobbin door or printed on the compartment showing the correct direction. If the arrow shows counterclockwise and your bobbin unwinds clockwise, flip it over.
Thread the bobbin through the tension slot
Hold the end of the bobbin thread and pull it into the slot cut into the left side of the bobbin compartment. Draw it under the small metal tension spring and into any secondary guide slots — you’ll usually feel it click or snap into place. This tension spring controls how smoothly the bobbin thread feeds; skipping it causes the thread to unravel too freely and produce loose stitches.
Leave a 6-inch thread tail and close the cover
Leave about 6 inches of bobbin thread hanging free. Slide the clear cover back into place. Don’t trap the thread under the cover — it should hang freely out of the slot. The bobbin is now loaded and ready.
With both threads loaded, you need to bring the bobbin thread up through the needle plate so both threads are positioned correctly at the back of the presser foot. This takes about 20 seconds once you’ve done it a few times.
Hold the upper thread loosely
With the presser foot still raised, hold the upper thread tail (from the needle) loosely in your left hand, keeping a gentle tension on it. Don’t grip tightly — just enough that you can feel when the bobbin thread is caught.
Turn the handwheel one full rotation toward you
Turn the handwheel slowly toward you (counterclockwise). The needle will descend into the bobbin area, catch a loop of the bobbin thread, and rise back up through the needle plate. As the needle rises you’ll see or feel a loop of bobbin thread appear at the needle plate level.
Pull up the bobbin thread loop
Gently pull the upper thread tail — you’ll pull up a loop of the bobbin thread with it. Use the tip of a seam ripper or small scissors to hook and pull the loop through fully until you have a single strand of bobbin thread, about 6 inches long, emerging from the needle plate.
Pull both threads to the back, under the presser foot
Hold both thread tails together and pull them toward the back-left of the machine, under the presser foot. Lower the presser foot. The machine is now fully threaded and ready to sew. Before starting on your actual project, always do a test seam on scrap fabric to confirm the threading is correct.
Quick test: Before sewing on your actual fabric, fold a piece of scrap fabric double, place it under the presser foot, and sew 4–5 inches at medium speed. Flip the fabric over and check both sides. Top stitches and bottom stitches should look identical — uniform, slightly sunken into the fabric, with no loops on either side. If they don’t, re-thread and test again.
Brand-specific threading notes
The steps above apply to the vast majority of home sewing machines. The main differences between brands are the number of thread guides, the position of the take-up lever, and the bobbin loading direction. Here’s what to expect on the most common machines.
Brother machines (CS6000i, XR9550, SE700 and most Brother home machines)
Brother machines number their thread guides clearly — you’ll see small numbers printed next to each guide on the machine body. Follow the numbers in sequence and you won’t miss a step. The bobbin compartment uses a diagram printed on the inside of the clear cover showing the thread path. Bobbin thread should unwind counterclockwise. Brother’s automatic needle threader is reliable and worth using; just make sure the needle is fully raised before engaging it.
Singer machines (4423, 4452, M1500 and most Singer home machines)
Singer machines follow the same U-shaped threading path but the thread guides are coloured rather than numbered on older models. The Singer 4423 and 4452 both have numbered guides on the current versions. The take-up lever is slightly more exposed on Singer machines, making it easier to see. Singer machines generally use counterclockwise bobbin loading. If your Singer came with a DVD or quick-start card, the threading diagram on it is worth referring to for your specific model.
Janome machines (HD3000, HD5000 and most Janome home machines)
Janome machines are threaded similarly to Brother and Singer, but many Janome models use a front-loading (horizontal) bobbin rather than a drop-in (vertical) bobbin. For front-loading: open the bobbin door at the front of the machine, remove the bobbin case, insert the wound bobbin into the case with the thread going counterclockwise, guide the thread through the slot and under the tension spring, then replace the case until it clicks. The rest of the threading process is identical to the steps above.
Troubleshooting: common threading problems
Thread bunching under the fabric (bird’s nest)
The most common cause is the upper thread missing the tension discs — usually because the presser foot was down during threading. Re-thread completely with the presser foot raised. Also check that the thread is fully through the take-up lever and not just looped near it. A less common cause is a bobbin inserted in the wrong direction.
Thread breaking after 2–3 stitches
Usually caused by the thread missing the take-up lever, or threading the take-up lever from the wrong direction. Check that the thread is actually through the lever hole and that the lever is at its highest position. Also check the needle is inserted correctly — flat side facing back — and that the needle isn’t bent or blunt.
Needle won’t catch the bobbin thread
The needle is probably not fully raised, or the bobbin thread didn’t thread through the tension slot in the bobbin compartment. Raise the needle to maximum height, confirm the bobbin thread is routed through the slot and under the tension spring, then repeat the bring-up process. Also check that the needle is inserted all the way into the needle clamp before the screw is tightened.
Skipping stitches
Usually indicates a threading problem with the needle rather than the upper path. Check the needle is inserted correctly (flat side facing back on most machines), not bent, the right size for your fabric, and fully raised into the needle clamp. Also confirm the upper thread is correctly through all guides — a thread that’s partially through a guide rather than fully seated can cause intermittent skipping.
Automatic needle threader not working
The threader hook is delicate and bends easily. Make sure the needle is at its absolute highest position — the threader only engages correctly at max height. If the hook is visibly bent, it may need straightening with a pin or replacing. Most sewing machine service centres carry replacement threaders and it’s a 5-minute repair.
Troubleshooting: common threading problems
Thread bunching under the fabric (bird’s nest)
The most common cause is the upper thread missing the tension discs — usually because the presser foot was down during threading. Re-thread completely with the presser foot raised. Also check that the thread is fully through the take-up lever and not just looped near it. A less common cause is a bobbin inserted in the wrong direction.
Thread breaking after 2–3 stitches
Usually caused by the thread missing the take-up lever, or threading the take-up lever from the wrong direction. Check that the thread is actually through the lever hole and that the lever is at its highest position. Also check the needle is inserted correctly — flat side facing back — and that the needle isn’t bent or blunt.
Needle won’t catch the bobbin thread
The needle is probably not fully raised, or the bobbin thread didn’t thread through the tension slot in the bobbin compartment. Raise the needle to maximum height, confirm the bobbin thread is routed through the slot and under the tension spring, then repeat the bring-up process. Also check that the needle is inserted all the way into the needle clamp before the screw is tightened.
Skipping stitches
Usually indicates a threading problem with the needle rather than the upper path. Check the needle is inserted correctly (flat side facing back on most machines), not bent, the right size for your fabric, and fully raised into the needle clamp. Also confirm the upper thread is correctly through all guides — a thread that’s partially through a guide rather than fully seated can cause intermittent skipping.
Automatic needle threader not working
The threader hook is delicate and bends easily. Make sure the needle is at its absolute highest position — the threader only engages correctly at max height. If the hook is visibly bent, it may need straightening with a pin or replacing. Most sewing machine service centres carry replacement threaders and it’s a 5-minute repair.
Frequently asked questions
Do I need to re-thread my machine every time I change thread colour?
Yes — for both the upper thread and the bobbin. When changing the upper thread, cut the old thread near the spool, pull the new thread through from the top (feeding it through the old thread path is a common shortcut but can cause problems), and re-thread fully. For the bobbin, wind a new bobbin with the new colour and reload it.
Should the upper thread and bobbin thread always match?
Not necessarily. For most projects the upper and bobbin threads should be the same colour so stitches look consistent on both sides. For quilting, some sewists use a neutral colour in the bobbin regardless of the top thread. For decorative top-stitching, using a contrast colour in the bobbin is intentional and fine — just make sure the tension is balanced so neither thread is pulling to the wrong side.
How do I know if I’ve threaded my machine correctly?
The clearest test is a seam on scrap fabric. If both the top and bottom of the seam look identical — small, even stitches sitting slightly inside the fabric surface — the machine is threaded correctly. If you see loops on the top, the bobbin tension or path is off. Loops on the bottom mean the upper threading is the problem. Thread bunching under the fabric almost always points to the upper thread missing the tension discs.
My threading diagram washed off the machine — where can I find it?
Search for your specific model number plus “threading diagram” on the manufacturer’s website. Brother, Singer, and Janome all have free downloadable manuals on their support pages. If you have an older machine with no model number visible, search by the machine’s visible features — most manufacturers’ older models have manuals archived on their sites going back 20+ years.
Next steps
Now that your machine is threaded, you’re ready to start sewing. These guides cover what comes next:
How to Choose a Sewing Machine — what to look for before you buy
How to Use a Sewing Machine — step-by-step from first seam to finished project
Best Sewing Machines for Beginners — if you’re still choosing a machine, these are our top picks
How to Oil a Sewing Machine — keep your machine running smoothly with the right maintenance routine